Client | VFX Supervisor
Role | Animator, Designer,VFX
Year | 2024
Research & Development
CHALLENGE
The challenge this time was to experiment with and develop a singular technical effect, whether it involved an explosion of yarn or fabric weaving. However, there’s a bit of a caveat which would be that you have to make this a realistic proof of concept that can be used later down the line for final production.
OBJECTIVE
Create a raindrop on glass VFX shot that integrates into a scene of the art director's choosing, to help enhance the narrative and atmosphere. The final render should be versatile enough for use in different lighting conditions.
RESEARCH
To get the accurate behavior of water droplets and rain on glass surfaces I had to be aware of several physical phenomena that water abided by, like the effects of gravity and light refraction, how water flows, collects, and refracts light on various surfaces were all pretty important to take note of when helping to form realistic 3D recreations. The two key elements I took note of however were:
- Cohesion
- Adhesion
Cohesion: This occurs due to water molecules' special nature and structure, water has a strong polar bond, with the oxygen atom being negatively charged and attracted to the positively charged hydrogen atoms. This causes water molecules to stick to each other.
Importance: This is the second most important factor to keep in mind because it informs me about the shape the droplet would need to take. If there is intense rain, the droplet would have less cohesion and no defined shape, and vice versa.
Adhesion: This is water's inherent ability to stick to other surfaces by creating weak surface bonds.
Importance: This was the most important factor to consider when making the raindrop effect, mainly because it determines the friction and how quickly the water will slide down, as different surfaces have varying materials and structural compositions.
REFERENCE
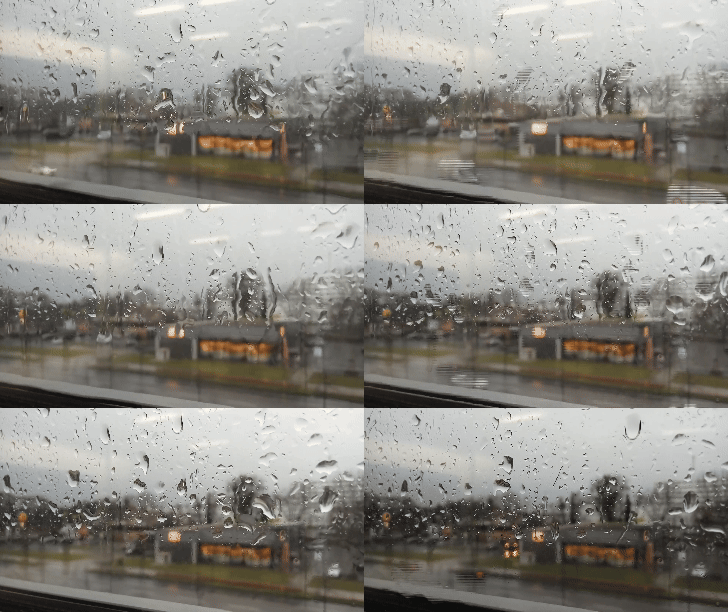
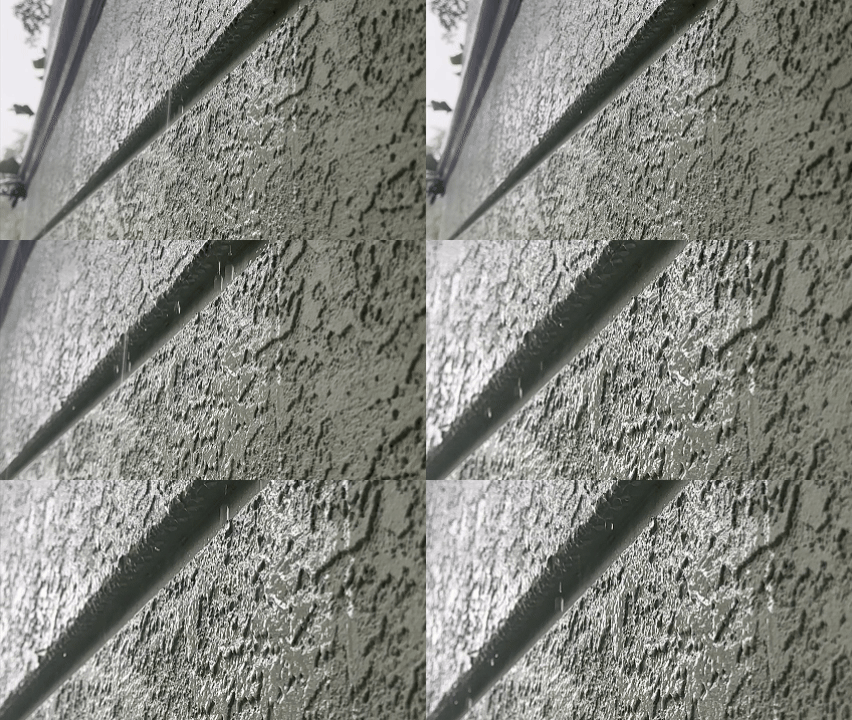
All Videos We're Sourced From Pexels.com
-
01.
-
02.

-
03.
-
04.
-
05.

-
06.

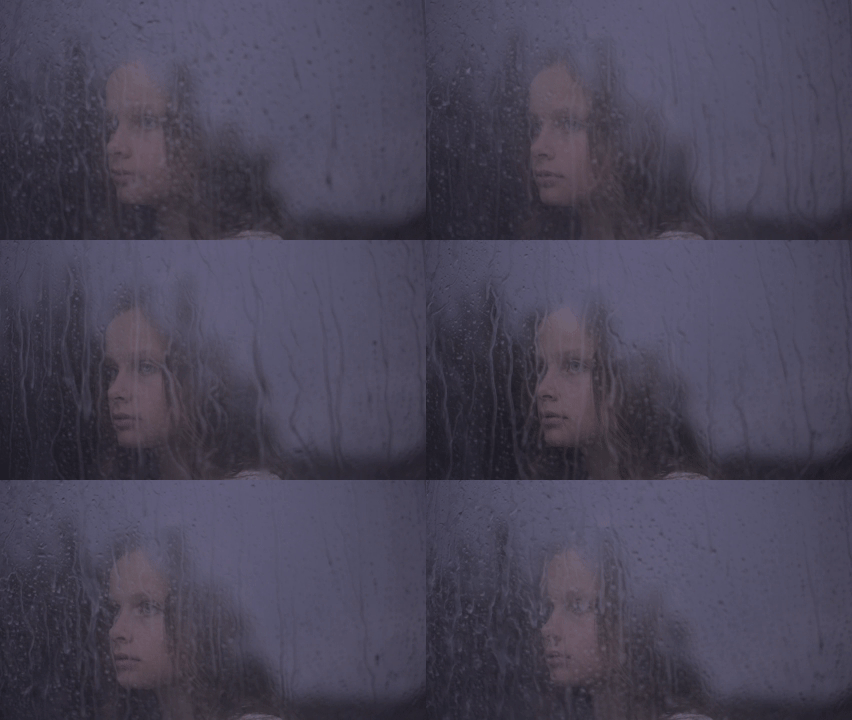
I took quite a bit of inspiration from the shot with the girl in it mostly due to the mood it was giving off it felt like there was something more to it compared to the other shots however on the matter of getting a close the required effect when it came down to how the sim was going to look I really liked shot 02.
TECHNICAL PROCESS
Cinema 4D
Redshift
ChatGPT
After Effects
Nuke
Houdini
TOOLS
SIMULATION
APPROACH 01
HOUDINI
From the very start of this project, and even up until near the end, Houdini seemed like it would be the right call to solve all the issues I would face, as there is no other software quite as robust for simulations. However, surprisingly, it wasn’t Houdini that gave me the best results in the end.
SOME ISSUES FACED
- Inability to randomize velocity of the individual particles.
- Particles would either curve into geometry or would just not fall off the edge of the geometry surface.
- The meshing was computationally really heavy.
- Overall everything was quite computationally heavy.
- Refractions of rain were pretty hard to get right due to the remesh quality being so poor
Houdini Trial 01
-
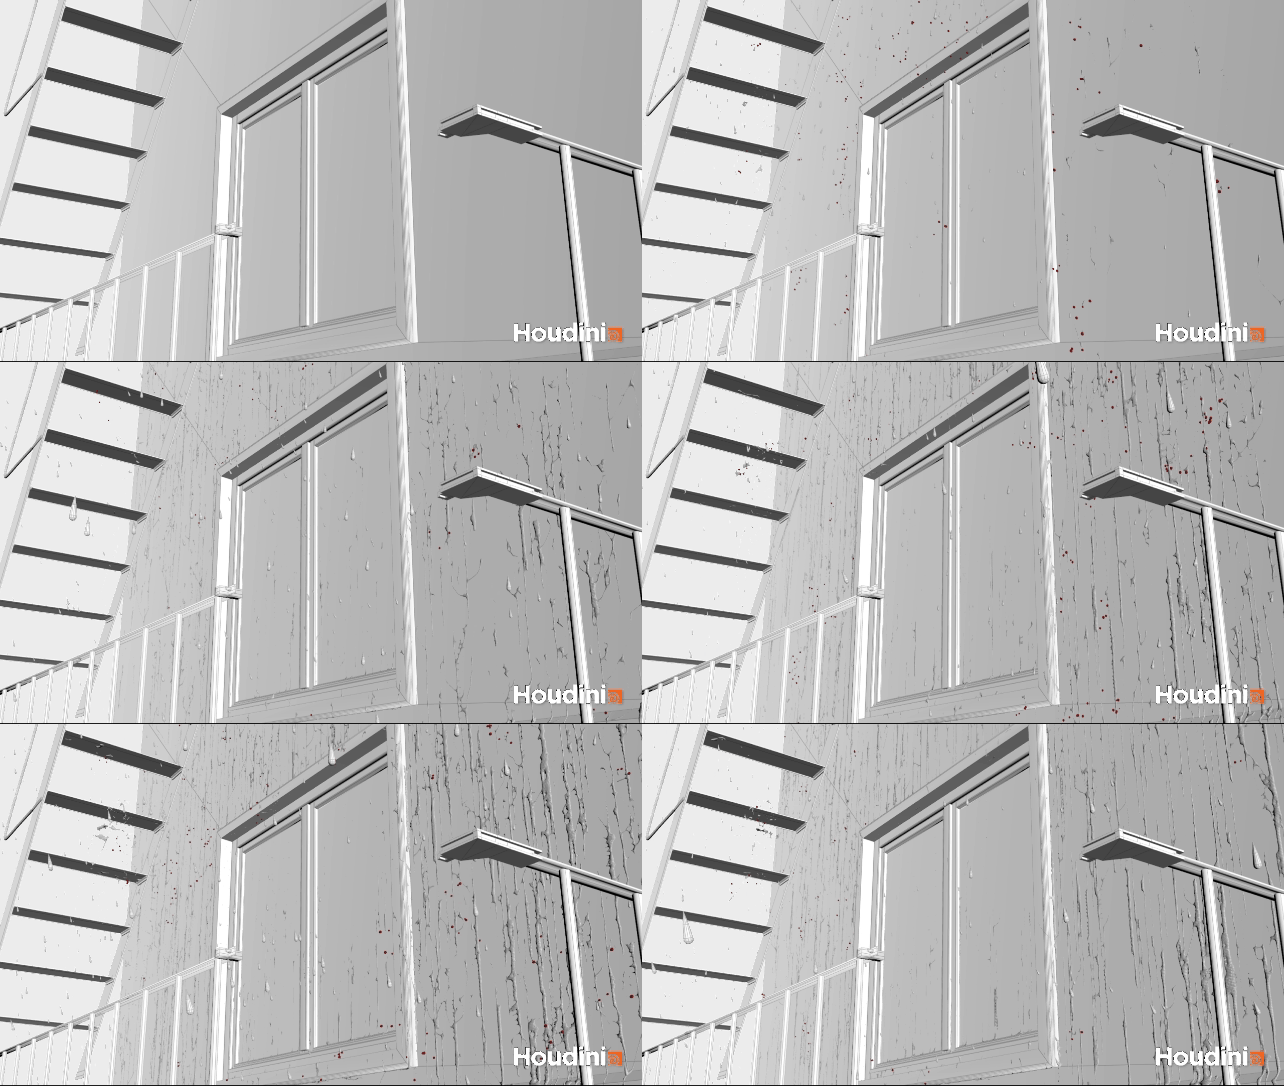
Sim Playback
This was some RnD before the actual RnD project and at the time I believed Houdini was the right call for sure cause I had the collisions working pretty well all while using a relatively simple POP net and I do think this would be useful in another scenario but for the project at hand it wasn't there yet
-
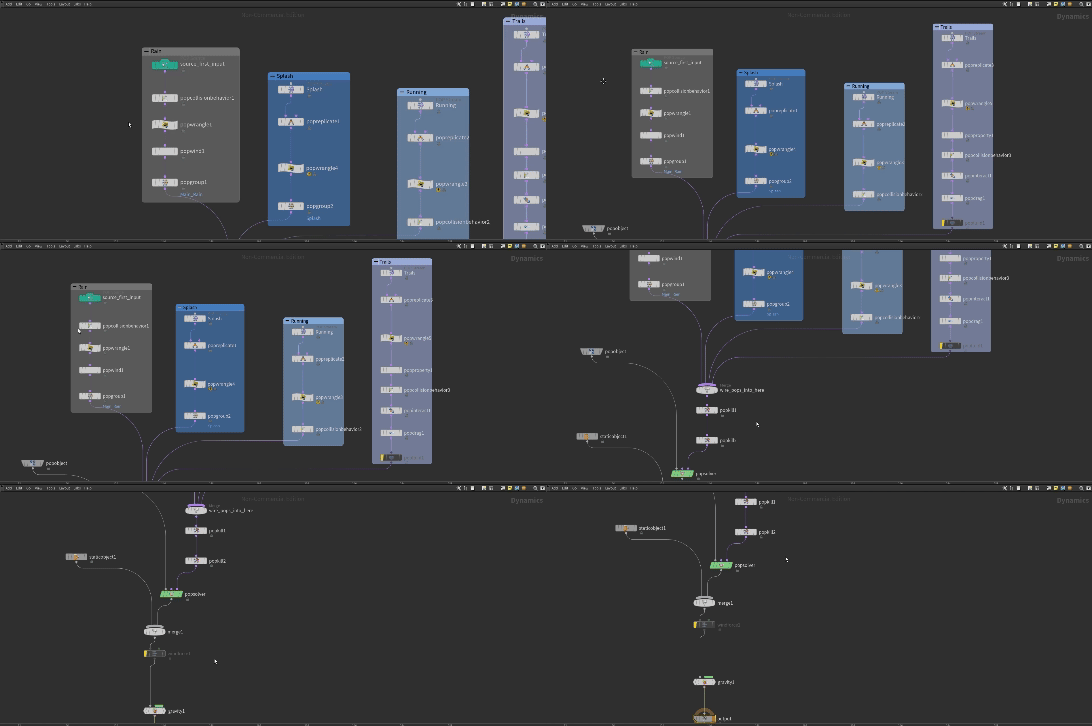
Particle Setup
This is a simplified overview of the node setup:
- Rain Generation: The Source_first_input node emits the initial rain particles, which are then controlled using POP Collision Behavior to manage how they react when they hit objects.
- Splash Creation: When raindrops hit a surface, the POP Replicate node generates splash particles, and the POP Range adjusts how these particles behave post-collision.
- Running Effect: As raindrops interact with surfaces, they begin to "run" down. A POP Replicate and POP Collision Behavior combination manages this effect, ensuring the drops slide naturally along the surface.
- Trailing Effect: I used another POP Replicate node to create particle trails that simulate water streaks left behind as the drops move. The POP Collision Behavior was set to slide rather than stick
- Physics Simulation: The POP Solver drives the entire simulation, it is pretty much the brain of everything this is where I can place any force I would need to affect the particles would live under
-

Remesher Setup
In the Houdini, I did a pretty basic mesh setup using:
- object_merge1: I used this node to import the sim from another network. In this case, it's the data from the `SIM_01/OUT` path.
- delete1: This node helped to filter out unwanted geometry or attributes. I used it to remove particles I wasn't going to utilize.
- trail: The `Trail` node was a pretty big one and was something I used to create trails from points, which made the raindrop streak.
- vdbfromparticles2: This node just converted the particles into a VDB (Volume Data Base) to create a volumetric representation from the particle simulation. It's useful when creating smooth, meshed versions of particle effects like fluid or smoke.
- convertvdb1: As the name implies I used this to convert the VDB back into a polygonal mesh format, so I could render it out as geometry.
- smooth2: I just used this to soften the appearance and remove any sharp edges or noise in the resulting mesh from the `convertvdb1` operation.
Houdini Trial 02
-
Sim Playback
For this trial I really wanted to try and get the animation as accurate as possible to what actual rain would be like
-

Particle Setup
For this setup, it was pretty much the same as the initial setup the main change came in the remeshing side of things
-
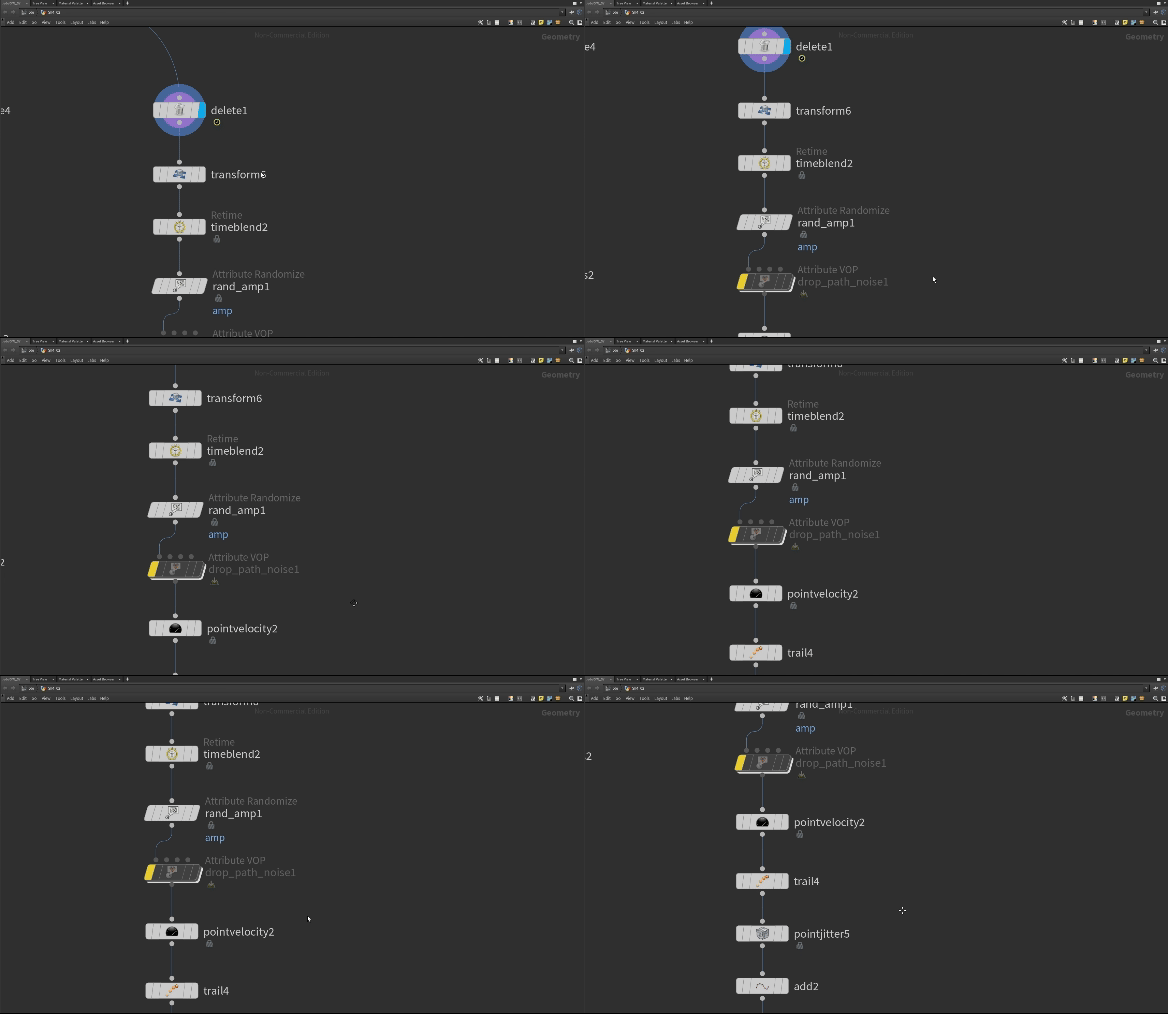
Remesher Setup Pt. 1
- Delete Node: This node removes unwanted particles or geometry, cleaning up the data that is not necessary for the final mesh creation.
- AttribWrangle1: A custom VEX expression that could be modifying the particle attributes like position, velocity, or any other property. It's common to use this node for fine-tuning how the particles behave or look.
TimeBlend Node: Blends the particle positions over time, ensuring smoother transitions between frames. This helps create fluid-like movement, reducing jerky or abrupt changes.
- PointVelocity Node: This node adds or modifies the particles' velocity. This step is essential for simulating realistic movement, giving the particles the proper directional flow that will eventually be transferred to the mesh.
- Trail Node: This node computes the particle trails over time. It generates additional geometry based on particle movement, useful for creating streaks or continuous forms that will contribute to the final mesh.
- PointJitter3 adds randomness to the particle positions, creating more organic and less uniform patterns in the particle distribution and enhancing the natural feel of the mesh.
-
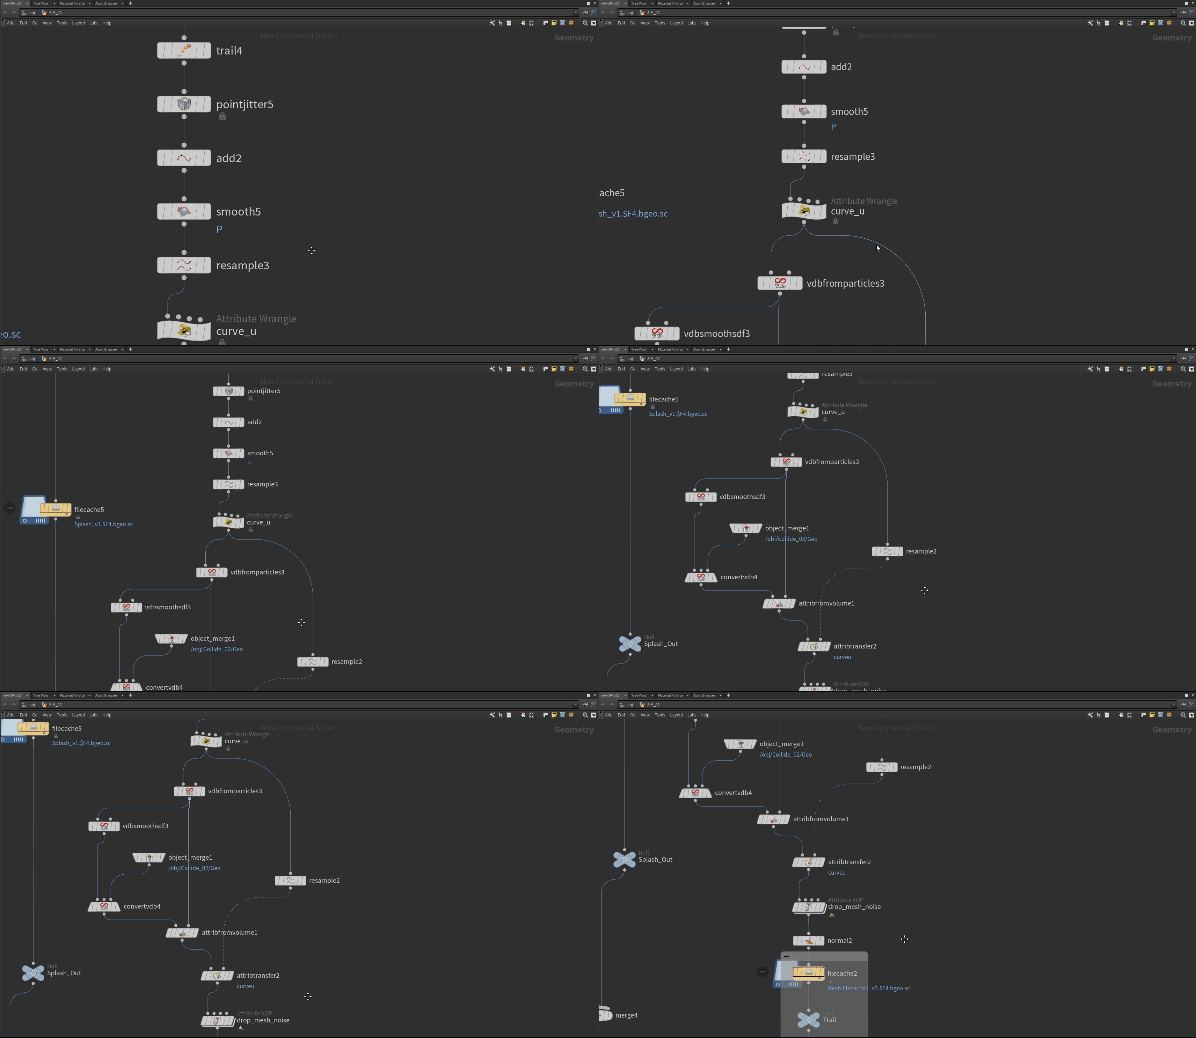
Remesher Setup Pt. 2
- VDBfromParticles2: Converts the particle data into a VDB (Volumetric Data) representation. This is the core step in meshing the particles, as VDBs allow you to turn points into a continuous volume, which will later be transformed into a polygon mesh.
- VDBSmooth2: Smooths out the VDB volume, removing harsh edges or noise from the initial conversion. This step is crucial for creating a polished and fluid surface.
- Convert VDB Node: Converts the smoothed VDB volume into polygons, which forms the final mesh geometry.
- Attribute Noise (Mountain1): Applies noise to the mesh, adding a rugged, mountainous feel to the surface. This noise can be used to add more texture and randomness, making the mesh appear more dynamic and less uniform.
- AttributeTransfer1: Transfers attributes (like color or velocity) from the original particles to the final mesh. This ensures that any important properties, such as motion or appearance attributes, are preserved.
- Final FileCache Nodes: The two FileCache nodes are used to save the simulation data at different stages, allowing for efficient playback or re-use of the data without re-running the entire simulation.
CHAT-GPT WITH HOUDINI
Chat GPT was an important part of this project in the early stages reason being that Houdini has a fascinating programming language called VEX that can quite literally let you gain and create control over things that weren’t even possible before,unfortunately, I am no expert in the field of VEX expression but luckily Chat GPT is as long as you know what your talking about
APPROACH 02
CINEMA 4D
During my explorations in Houdini, I encountered several challenges, leading me to reconsider my approach. I hadn't originally intended to use Cinema 4D for simulation work, as early tests lacked the precision I needed. However, after extensive troubleshooting and research—along with insights from peers—I realized that the behavior of rain closely resembled condensation. This shift in perspective became the key to successfully developing the rain system. By thinking of the simulation as condensation rather than traditional rainfall, I was able to achieve a more natural and realistic outcome.
-
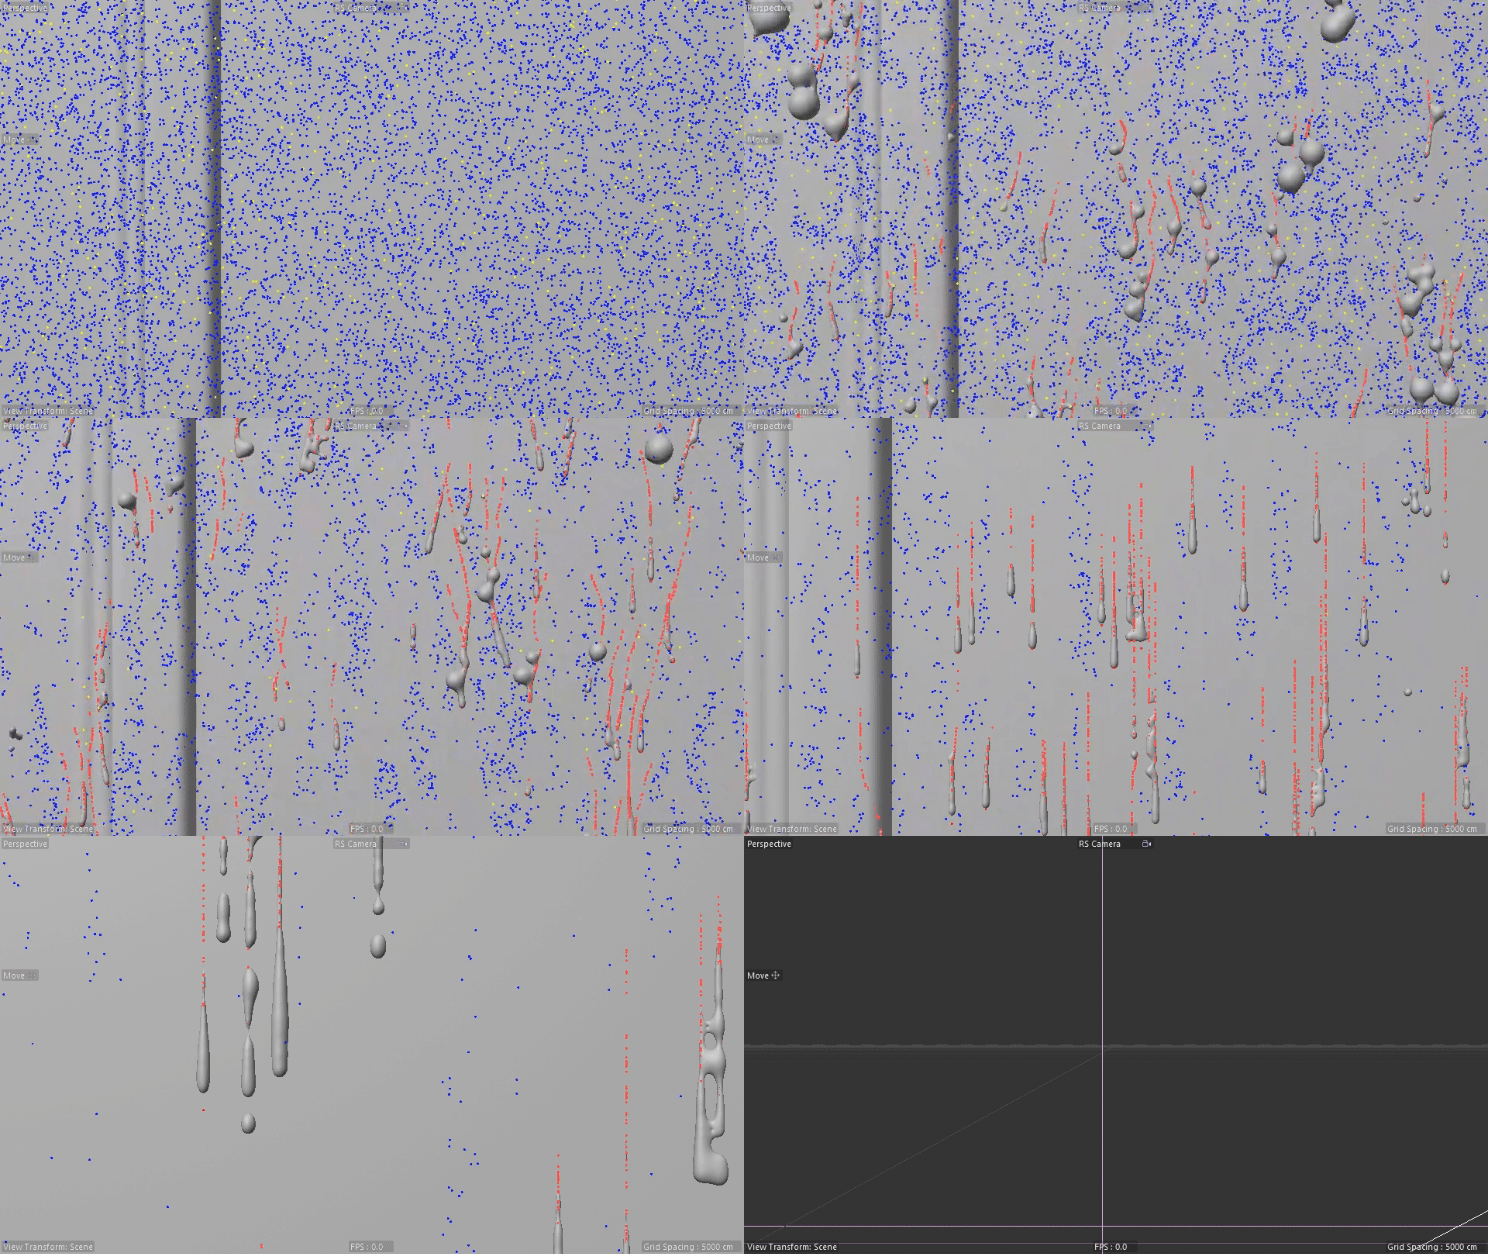
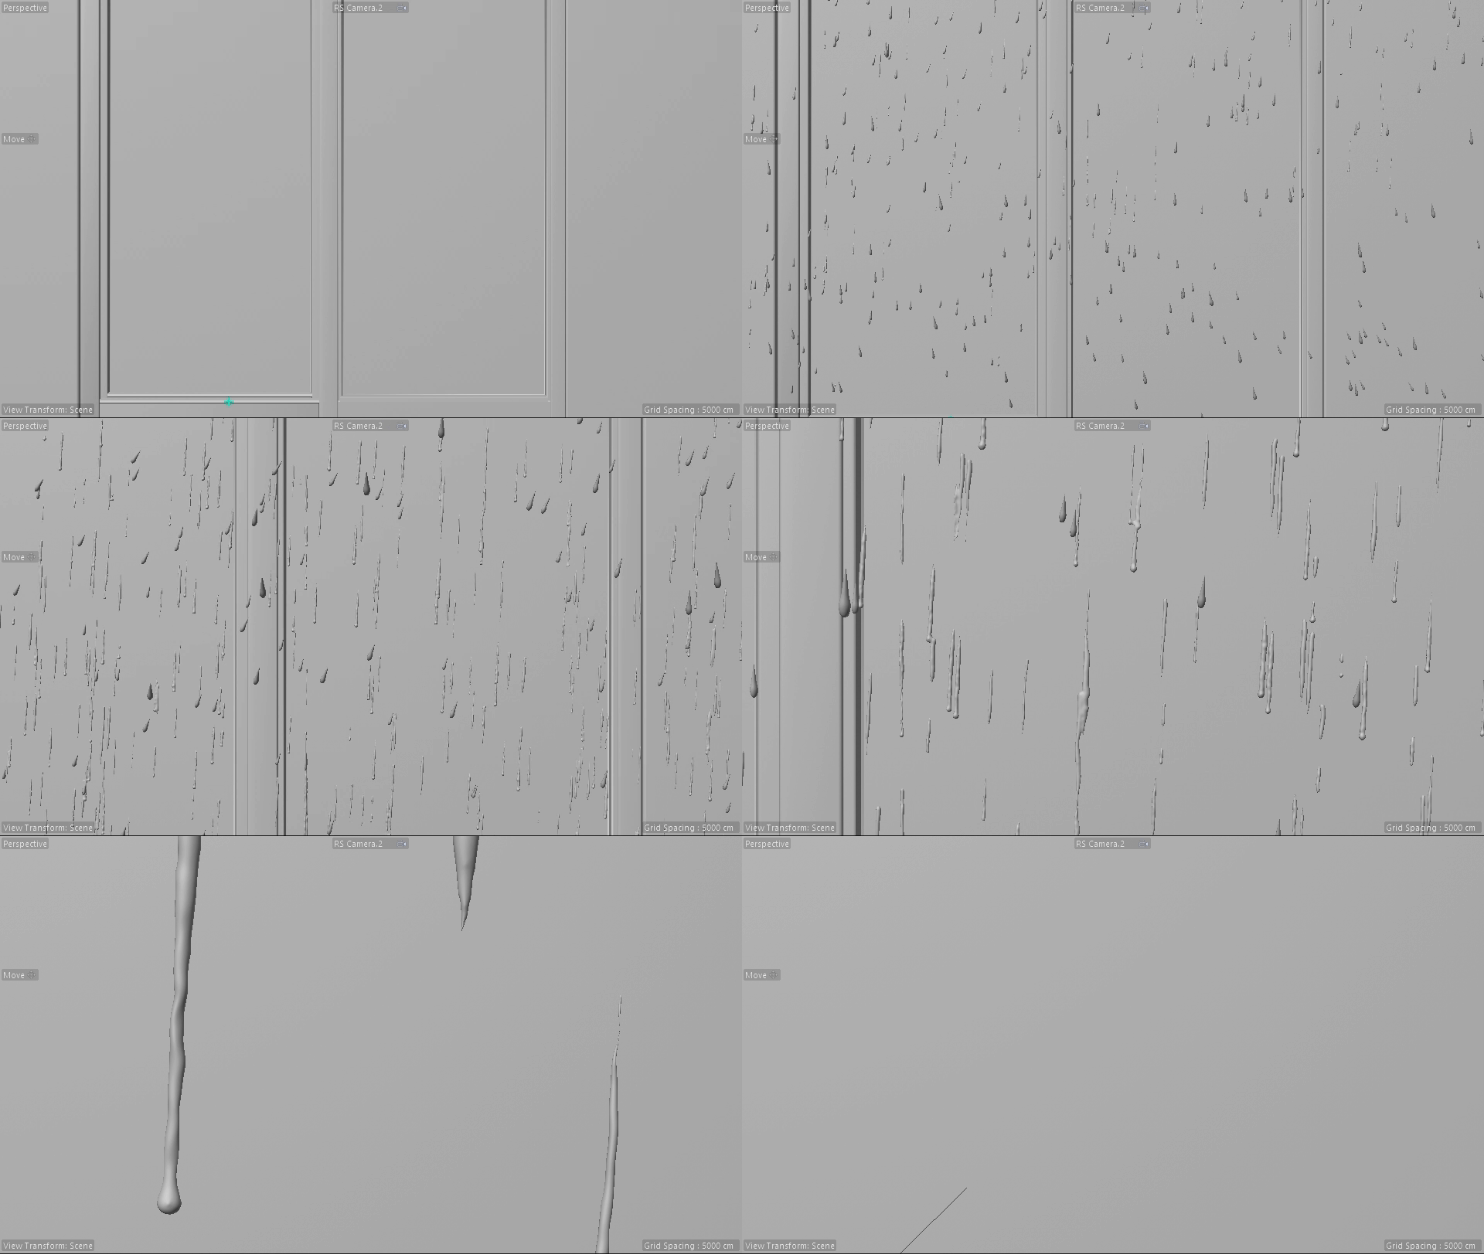
Sim Playback
To my suprise, I found Cinema 4D’s latest particle system update to be surprisingly effective for my raindrop simulation compared to Houdini. While Houdini is overall more flexible, Cinema 4D beat it out by being more art-directable, making it easier to achieve the specific look I was aiming for. Customizing the raindrop velocities was more intuitive, and applying geometry to the particles proved to be far less computationally demanding. This really showed me that Cinema 4D was the best path for this particular project, though I believe there’s more for me to explore in Houdini's capabilities as well.
-

Particle Setup
The setup looks like it splits the rain particles into two main groups: large and small static particles. Each group is controlled with friction, gravity, and randomized size adjustments with the math effector. The rain particles are programmed to either stick to surfaces or detach based on specific conditions, such as age or size.
The Key components include:
- Particle Separation: Splits particles by size for more natural variation.
- Surface Interaction: Uses Predator Prey and surface attract nodes to manage particle sticking behavior.
- Dynamic Detachment: Active particles can detach, slow down, or leave trails as they interact with the geometry.
- Controlled Deactivation: A system of conditions removes particles when they get too small or too old, simulating raindrops fading away.
-

Remesher Setup
The remesher setup for this project was straightforward yet effective. I started with a Volume Builder, setting the particle groups in the Volume Builder to "Scale Based on Particles" and then adjusting the voxel threshold to be between 0.01 and 0.05 for optimal detail. Once the volume was built, I passed it through a Volume Mesher to generate the geometry. To refine the result and remove any jagged edges, I applied a Smooth Deformer, giving the final mesh a clean and polished look.
COMPOSITING
APPROACH 01
NUKE
After experimenting with the rain simulation, I reached a point where I needed to combine real footage with the 3D rain. I thought NUKE, being a top compositing tool, would give me the best results, but I ran into several challenges. While I got close, there were too many details I couldn’t control. In the end, I decided not to rely solely on NUKE and instead went back to re-render, paying more attention to those details I realized I couldn’t control in NUKE. As an art director once told me, "fix it in pre."
SOME ISSUES FACED
- At my current skill level compositing in refractions onto each raindrop was a task that would require time I was unsure I even had anymore.
- Creating depth and getting a proper rack focus was going to be too computationally heavy due to the requirement of the PGBokeh (Bokeh) node.
- Aside from not being able to get a proper refraction of light from the droplets I was unable to get the right distortion from it as well.
(Whether I had enough time or not I doubt I would have been able to create refractions that never existed, so I re-rendering most definitely would have been inevitable)
NUKE Setup
-

AOV Channels
In this step, I worked with AOV (Arbitrary Output Variables) channels to separate various passes for better control over the composition. This allowed me to adjust specific elements like lighting, reflections, and shadows individually, which could help polish the final image a lot more.
-

Camera Import
(This step was no longer used however I think it was still pretty useful)
In this phase I imported the 3D camera data into NUKE to synchronize the plate footage with the movement in my 3D scene. This integration was what I tried to use to align the rain simulation accurately within the frame, to maintain the visual flow between the 3D environment and the 2D plate.
-

Motion Blur
I attempted to create motion blur with the motion vector AOV channel becuase it outputs a color channel that shows object movement which was going to be really useful for the raindrops that would be in the foreground but the intial issue I had with this was that the rain footage and the mid ground were render all on the same plate which caused strange blurring or distortions on the mid ground layer but this was a simple fix because I just needed to render the rain seperately
CINEMA 4D + Nuke
APPROACH 02
As I mentioned before I couldn’t solely rely on nuke this time with this (most definitely cause of m skill level at the moment), so I went ahead to add on cinema to help fill in the gaps I was missing solely with things I couldn’t just composite in like the reflections, the parallax and refractions these we’re things that I needed to recreate or rather takes note on.
-

Lighting
To tackle the issue I had the most when I was stuck with getting proper refractions, I set up a couple of things in my Cinema file, one of them being projections within the lights themselves. This was super useful when it came to creating reflections on the window and in the droplets especially, and all you need to do is just place an image or PNG sequence into your light's texture and then switch over to the animate tab if you're using a PNG sequence.
-

Motion Blur
This is still pretty much the same as the last time I created motion blur I just increased the value of the motion vector to get better motion blur.
PLATE CAPTURE
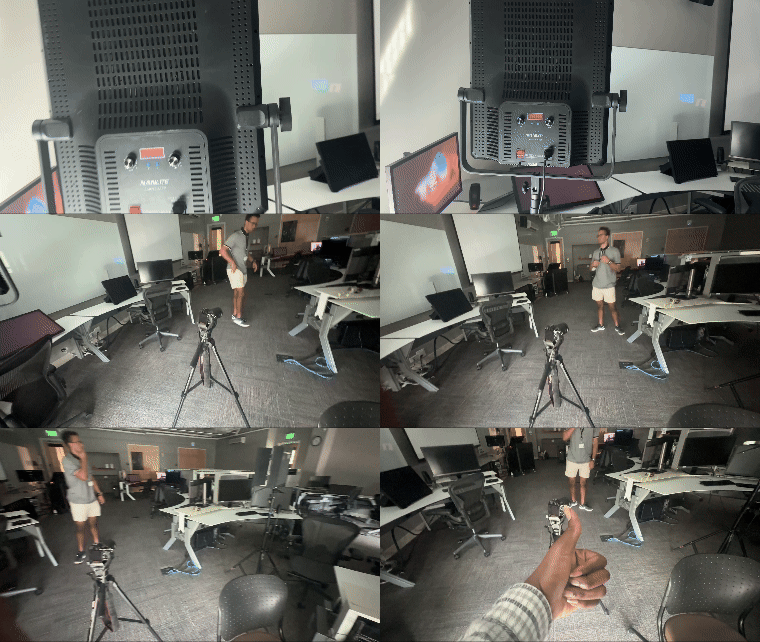
Getting usable plate footage was also going to be a determining factor here, mostly because it gave me the freedom to create the perfect situation for the animation to be played in. It also let me have true control over things like lighting, which is another necessary factor to make the shot believable.
(This was not a focus for this part but rather to help in the development of the proof of concept)
BEHIND THE SCENES
ANIMATION & COMPOSITING PASSES
1st Pass
- The rain feels more streamlike rather than raindrop like it doesn’t hit the requirement.
- The rain falling is larger a bit too large and unrealistic.
- The shot isn’t really painting a scenario at the moment it seems like VFX for VFX sake.
- Try having the rain be a metaphor for something happening like an emotion.
2nd Pass
- The droplets dont hold up when up close.
- The cohesion and the way the rain breaks apart doesnt occur here which breaks the immersion a bit too much.
- Push through the water with distortion
- The comp is a bit lack luster at the moment.
Revision Pass V01
- The connotation was a tad bit too serious which is why version 2 was selected
Revision Pass V02
- The warping of the screen should be way more subtle and shouldn’t stretch
- When the rain attracts to each other it creates an unusual popping effect which breaks the immersion of it all
- When the falling rain droplets go by it creates an unusual blurring effect which also breaks immersion
- Up close the reflection of the light in the droplets feels a bit harsh try changing the angles or turning it down
Extra Critique V00
- The bokeh effect is really strong and doesn’t really make sense right now.
- Make the absorption of the particles that have made contact happen faster.
- Refraction aren’t in the right place.
- The composition at the end of the frame is out of place it feels odd in consideration to the previous frame.
Suggestion:
- Maybe have moving lights?
- Maybe having a cold exterior and a warm interior would be more interesting?
Extra Critique V01
- Try having the trails last longer
- Fade the text instead of having it animate so it doesn’t feel as energetic, which doesn’t match the mood here.
The reflection in the window feels a bit odd because it doesn’t move with the camera. It should scale up with the camera as it moves forward to better match the parallax.
- When the raindrops get blurry, they get noisy, so denoise after the render.
- Take off the glow in the text it detracts from the mood
- The raindrops are a bit too large when falling and going by
OUTCOME
Throughout this project, I never felt like everything was running smoothly. It often felt overwhelming from issues with simulations, render crashes, missing alpha channels, and other technical problems I still haven't fully solved. Despite these challenges, I managed to get a decent result by focusing on my strengths, something I tend to overlook. While I used several different software, I always ended up back in Cinema 4D when things got too overbearing. It's not that I don't like challenges, but I realized that I could problem-solve more effectively in Cinema 4D. I realized I often get caught up in trying new things and forget to stick with what works.
FINAL ANIMATION.
BREAKDOWN.
-
Model - Deavon Goods


